by Adam | May 18, 2018 | Featured, GloKitchen
As the wedding of Meghan Markle and Prince Harry draws ever closer, excitement is reaching fever pitch.
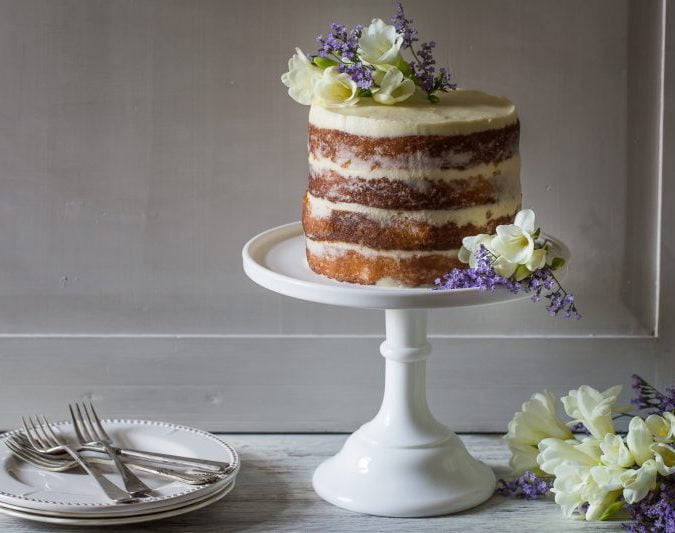
The happy couple are having a lemon and elderflower wedding cake made by a London baker, Hackney-based baker Claire Ptak has been selected to make Prince Harry and Meghan Markle’s wedding cake.
She will make a lemon elderflower cake which will be smothered in buttercream and decorated with fresh flowers.
The recipe for the wedding cake will no doubt be bespoke and kept secret ahead of the wedding on May 19.
Here is Claire going through the stages of making the cake of the year
But you can create your own lemon and elderflower drizzle cake if you want to have a taste of what the couple will experience on the day..
So here’s how to make your own
Elderflower and Lemon Drizzle Cake
Ingredients
- 225g butter, softened
- 225g caster sugar
- 4 large eggs
- 225g self-raising flour, sifted
- zest and juice of 1 lemon
- 100ml Elderflower Cordial
- 2 table spoons granulated sugar
Instructions
- Preheat the oven to 180°C/fan 160°C/Gas Mark 4. Grease a 20cm round, deep, loose-based tin and line with baking parchment.
- Place the butter, sugar and lemon zest in a large bowl. Use an electric whisk to beat the butter and sugar together until they are pale and fluffy. Gradually add the eggs, whisking well between additions and adding 2 tbsp of the flour with the last egg – this will prevent curdling.
- Sift over the remaining flour, then gently fold in with a metal spoon along with 2 tbsp hot water. Spoon into the prepared tin, level the surface and bake for 45-50mins or until it is shrinking away from the sides of the tin. A fine skewer inserted in the centre should come out clean. Cool in the tin for 5 mins.
- Squeeze the lemon juice, then sieve to remove the bits, and stir in the cordial. Use a fine skewer to prick the cake all over. Pour over the syrup, then sprinkle over the sugar – it should sink in but leave a crunchy crust.
- Alternatively decorate the top with a thin glaze made from icing sugar and lemon juice. Add edible flowers.
- Leave to cool completely before removing the cake from the tin
We would love to see your photos if you make this cake
or are having a “royal wedding” day celebration.
Follow and Like us on Facebook https://www.facebook.com/glotimetv/
Follow us on Instagram https://www.instagram.com/glotimetv/
Follow us on Twitter https://twitter.com/GloTIMETV_

by Adam | Apr 28, 2017 | Featured, GloKitchen
Chicken Kiev seems to have its origins in Russia, but it could have originated from France as the Eastern block countries tended to adapt the famous French cuisine recipes for their own culinary kitchens. But history lesson over, try this recipe – it will definitely go down a treat and is divinely tasty when served hot with vegetables and new potatoes.
Ingredients
100g butter
2 cloves garlic, peeled and finely grated
1 tsp salt
½ tsp cayenne pepper
3 tbsp chopped parsley
2 large skinless chicken breasts
150g plain flour
2 large eggs
150g Japanese “panko” breadcrumbs (you can use normal breadcrumbs but Panko gives a better crunch)
vegetable oil, for frying
sea salt

Method
Beat together the butter, garlic, salt, pepper and parsley until well combined. Put the butter into a food bag, twist the bag to push the butter into one corner and snip off the tip.
Using a sharp knife, make a deep, wide ‘pocket’ in the thick end of each chicken breast, don’t cut all the way through. Fill each chicken breast with as much of the butter mixture as possible.
Sprinkle the flour onto a plate. Beat the eggs in a bowl. Sprinkle the panko breadcrumbs onto another plate.
Dust each chicken breasts in the flour, then dip into the egg, then roll them in the breadcrumbs until completely coated. Place the coated chicken breasts onto a plate, cover with cling film,chill them in the fridge for at least 20 minutes.
Preheat the oven to 200C
Heat the vegetable oil over a medium heat in a large non-stick frying pan. Fry the chicken Kievs for 3-4 minutes on each side until golden-brown all over. Sprinkle with salt flakes, then transfer to a baking tray and cook in the oven for 10-15 minutes, or until the chicken is cooked through. (The chicken is cooked through when the juices run clear when the thickest part of the meat is pierced with a skewer – remember not to pierce the chicken all the way to the centre!)
Serve.

Follow and Like us on Facebook https://www.facebook.com/glotimetv/
Follow us on Instagram https://www.instagram.com/glotimetv/
Follow us on Twitter https://twitter.com/GloTIMETV_
by Adam | Apr 14, 2017 | Featured, GloKitchen
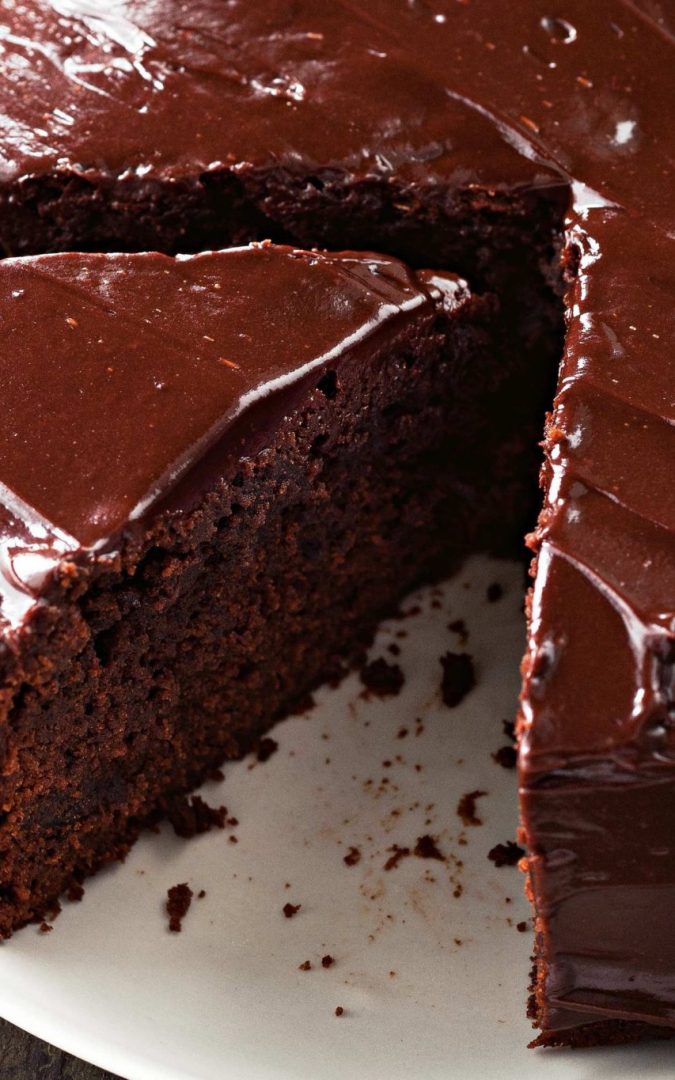
Every Easter I swear that I will not over indulge on Easter Eggs and Chocolate, but all resolutions go by the wayside as I devour chocolate bite by bite. If you are going to indulge, do it in style with our scrumptious chocolate cake. You will feel you have died and gone to Heaven. Make it worth your while because Easter starts here:
Ingredients
For the cake
225g plain flour
350g caster sugar
85g cocoa powder
1½ tsp baking powder
1½ tsp bicarbonate of soda
2 whole eggs
250ml milk
125ml Bertolli Olive Oil (This will keep the cake moist and give a wonderful flavour)
2 tsp vanilla extract
250ml hot water
For the chocolate icing
200g plain chocolate
200ml double cream

Method
Preheat oven to 180C. Grease and line two 8in sandwich tins.
Place all of the cake ingredients, except the boiling water, into a large mixing bowl. Using a wooden spoon, or electric whisk, beat the mixture until smooth and well combined.
Add the boiling water to the mixture, a little at a time, until smooth. (The cake mixture will be very wet.)
Divide the cake mixture between the sandwich tins and bake in the oven for 25-35 minutes, or until the top is firm to the touch and a knife inserted into the centre of the cake comes out clean.
Remove the cakes from the oven and allow to cool completely, still in their tins, before icing.
For the chocolate icing, heat the chocolate and cream in a saucepan over a low heat until the chocolate melts. Remove the pan from the heat and whisk the mixture until smooth, glossy and thickened. Set aside to cool for 1-2 hours, or until thick enough to spread over the cake.
Run a round-bladed knife around the inside of the cake tins to loosen the cakes. Carefully remove the cakes from the tins.
Spread a little chocolate icing over the top of one of the chocolate cakes, then carefully top with the other cake half
Place the cake to a serving plate and ice the cake all over with the chocolate icing, using a spatula.
Serve with some Double Cream for an extra special treat
Follow and Like us on Facebook https://www.facebook.com/glotimetv/
Follow us on Instagram https://www.instagram.com/glotimetv/
Follow us on Twitter https://twitter.com/GloTIMETV_


